GUEST.DAT
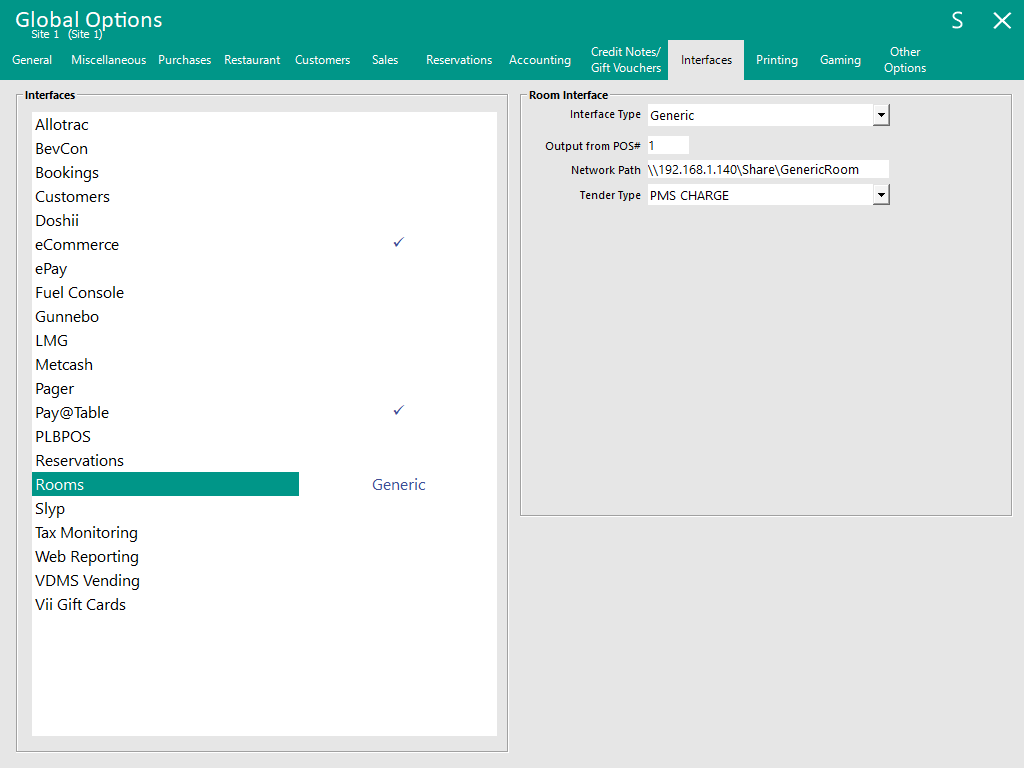
The Generic Room Interface requires a GUEST.DAT file to function.
The GUEST.DAT must be placed within the network path that was configured above for the Generic Room Interface.
The GUEST.DAT file will store information about Room Numbers/Guests and will be used when tendering to the PMS CHARGE/ROOM CHARGE Tender Type.
The format of the GUEST.DAT is as follows:
RoomNumber,CustomerName,CreditLimit,CurrentBalance,ScanCode
Example GUEST.DAT for demonstration purposes
For the purpose of setting up the system for demonstration, a GUEST.DAT can be created as follows and saved into the Network Path configured above.
The information shown in the demo file below translates to the following:
Room 100 has Guest "Joe Blow" staying in the room with a Credit Limit of $1000, a Current Balance of $0 and a Scan Code of 123123123123
Room 101 has Guest "Joanne Blow" staying in the room with a Credit Limit of $1000, a Current Balance of $500 and a Scan Code of 234234234234
100,Joe Blow,1000,0,123123123123
101,Joanne Blow,1000,500,234234234234
GUEST.DAT Notes!
The Credit Limit and Current Balance is entered as whole dollars.
E.g. If a value of 100 is specified, this means either a Credit Limit or Current Balance of $100 will apply to the Guest.
The Current Balance refers to the balance that has already been used.
E.g. If the Credit Limit is set to 100 and the Current Balance is set to 50, this means that the Guest has $50 remaining.
Attempting to tender more than the remaining value will display an Exceeded Credit Limit prompt, preventing the remaining balance from being exceeded.
Also note that Idealpos does not update the value stored in the Current Balance after tendering to the PMS CHARGE Tender/posting charges to the Guest/Room.
CHARGES.DAT
Charges will be posted to the CHARGES.DAT file in the following format:
TransactionType,RoomNumber,CustomerName,Department,GLCode,QTY,Amount,Location,DateStamp,AddOnTaxInUse(0=AddOnTaxInUse,1=AddOnTaxNotInUse),DepartmentTotalAddOnTaxAmount,DepartmentTotalInclusiveTaxAmount,AuditNumber
Information about Department Total Add On Tax Amount/Department Total Inclusive Tax Amount:
- DepartmentTotalAddOnTax refers to Add On Tax in regions such as USA, where the Inc checkbox (in Global Options > Sales) can be unchecked for a Tax Rate, which triggers the Tax to be added onto the item at the end of the sale for Stock Items that have the corresponding tax rate enabled. Stock Items that have Add On Tax applied to them will trigger the Total Add On Tax to be populated in the DepartmentTotalAddOnTax field.
- DepartmentTotalInclusiveTax refers to Inclusive Tax, where the Inc checkbox (in Global Options > Sales) is ticked for a Tax Rate, which triggers the Tax to be included in the Stock Item's sell price for Stock Items that have the corresponding tax rate enabled. Stock Items that have Inclusive Tax applied to them will trigger the Inclusive Tax to be populated in the DepartmentTotalInclusiveTax field.
- Inclusive Tax can be used in all regions (in regions such as Australia, all Tax Rates that are configured in Global Options are treated as inclusive and other regions such as USA can use Inclusive Tax by enabling the Inc checkbox in Global Options > Sales for a specific Tax Rate).
CHARGES.DAT Notes!
When a Gift Voucher Redemption is performed, the Gift Voucher Code will be listed in the GLCode field of the PAY Transaction Type.
All transactions will be posted to the CHARGES.DAT.
When tendering with the Tender Type linked to the Generic Room Interface, one or more lines with a Transaction Type of CHARGE will be posted to the CHARGES.DAT (one line for each Department).
When tendering using any other Tender Types, two Transaction Types will be posted to the CHARGES.DAT; one or more lines with a Transaction Type of CHARGE AND a single line with a Transaction Type of PAY.